Basic Python - Introduction
Goal
This book will talk about programming in Python. The goal for it is to be a guide that is simple to be read and practiced, with clear language and clear examples. No philoshopical talk, no Python history, nothing of the kind, just Python, its syntax, features.
This book assumes you have basic knowledge on how to use a computer and the terminal in your operational system.
Why Python?
Python is an extremely popular language, with lots of features. It can be used for web development, data analysis, scientific programming, desktop development and much more.
A lot of this popularity also happens because of how easy to read Python code is. Lots of its expressions and functions are quite similar to the english language, and this really helps when learning.
After learning Python, you can learn other languages and frameworks, broad your skillset and study whatever it is that interests you the most.
Python Version
If you still don’t know, Python has two more popular versions, Python 2 and Python 3. Python 3 is the current supported version, and code written in Python 2 is not 100% compatible with it. There are considerable differences between them.
We are using Python 3 in this book, as there is no reason for someone that’s starting to not use it. But be mindful that lots of code on the internet and old literature may be written in Python 2 and might not work as intended.
Installing Python
There are lots of ways to install Python. Let’s use the Anaconda distribution. This is a Python distribution that already has lots of useful packages, widely used in scientific programmin, data analysis, etc.
It also comes with a free IDE, Spyder, that is good enough to start programming. IDE means Integrated Development Environment, and it’s basically a tool that is used for software development, with features like code completion, syntax highlighting, running code inside of the editor itself.
Anaconda is easy to install in any operational system. To download it, access: https://www.anaconda.com/products/individual#Downloads
In this link, you will find download options for Windows, Linux and OSX. The page has some resources to troubleshoot in case you get stuck while installing.
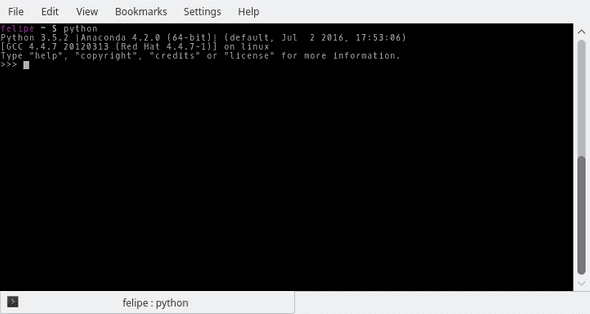
To check if the installation concluded correctly, open your operational system’s Terminal (for Windows, it will install a Anaconda specific terminal, called Anaconda Prompt), type Python and hit enter. If everything worked, you should see something similar to the screenshot below:
This is Python’s command shell. Here, you can type Python commands and see their outputs. Do a test, type the code below and hit ENTER:
>>> print("Hi, Python")
Hi, Python
You will see the output, which is what you wrote inside the parenthesis. We will talk more about this in later chapters, but you can already see that it’s working.
To get out of the Python terminal, just type exit() and hit ENTER.
IDEs and Text Editors
Spyder is the IDE that comes together with the Anaconda distribution. It has lots of features that were thought for data analysis, but it can also be used for the development of any kind of Python code.
You can also use another text editor of your choice if you have one. Visual Studio Code, for example, is free and a greatly recommended one.
With IDEs and text editors, you can work through Python files, instead of through the Python command shell that we say above. Python files have the .py extension. Open your text editor, create a new file and wrote the same code we typed above in the command shell. Just as a reminder, here it is:
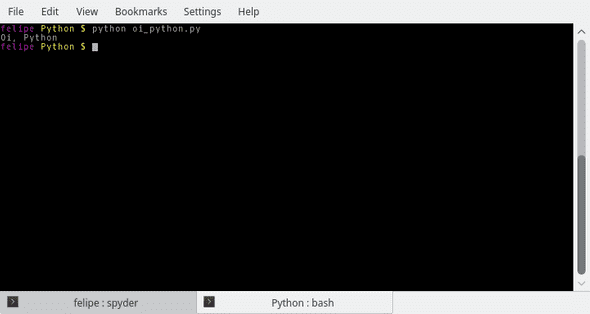
print("Hi, Python")Save this file with the name hi_python.py, in an easily accessible folder. Open your terminal, go to the folder and run python hi_python.py. The output will be the same as when we ran the command through the Python command shell, as shown in the image below.
And this (in an overly simplistic representation) is the way that complex software and projects are built.
Through this book, we will keep using files to develop our projects. The name of the file is up to you, anything with a .py file extension works. Whatever you have to input will come first, and then the expected output will be right after, with a leading >.
This makes it easier to share the code, divided by chapter. It’s also more simple for some of the more complex topics, like defining functions, for example. Below is an example of how a code will look like in this book, just so you can have a feeling on what to expect.
name = input("Type your name here: ")
print("Hello, %s" % name)

> Type your name here: Felipe
> Hello, Felipe
Type or copy code?
This is normally a personal preference. You can copy the code in this book and use in any way you want.
With that said, my feeling is that you will probably absorb the content better if you read, understand and write the code.
Conclusion
And, with this, we finish this introductory chapter. Basically, we introduce the subject a little bit and make some preparations for what is to come.

